
Bind
Tactical Overview
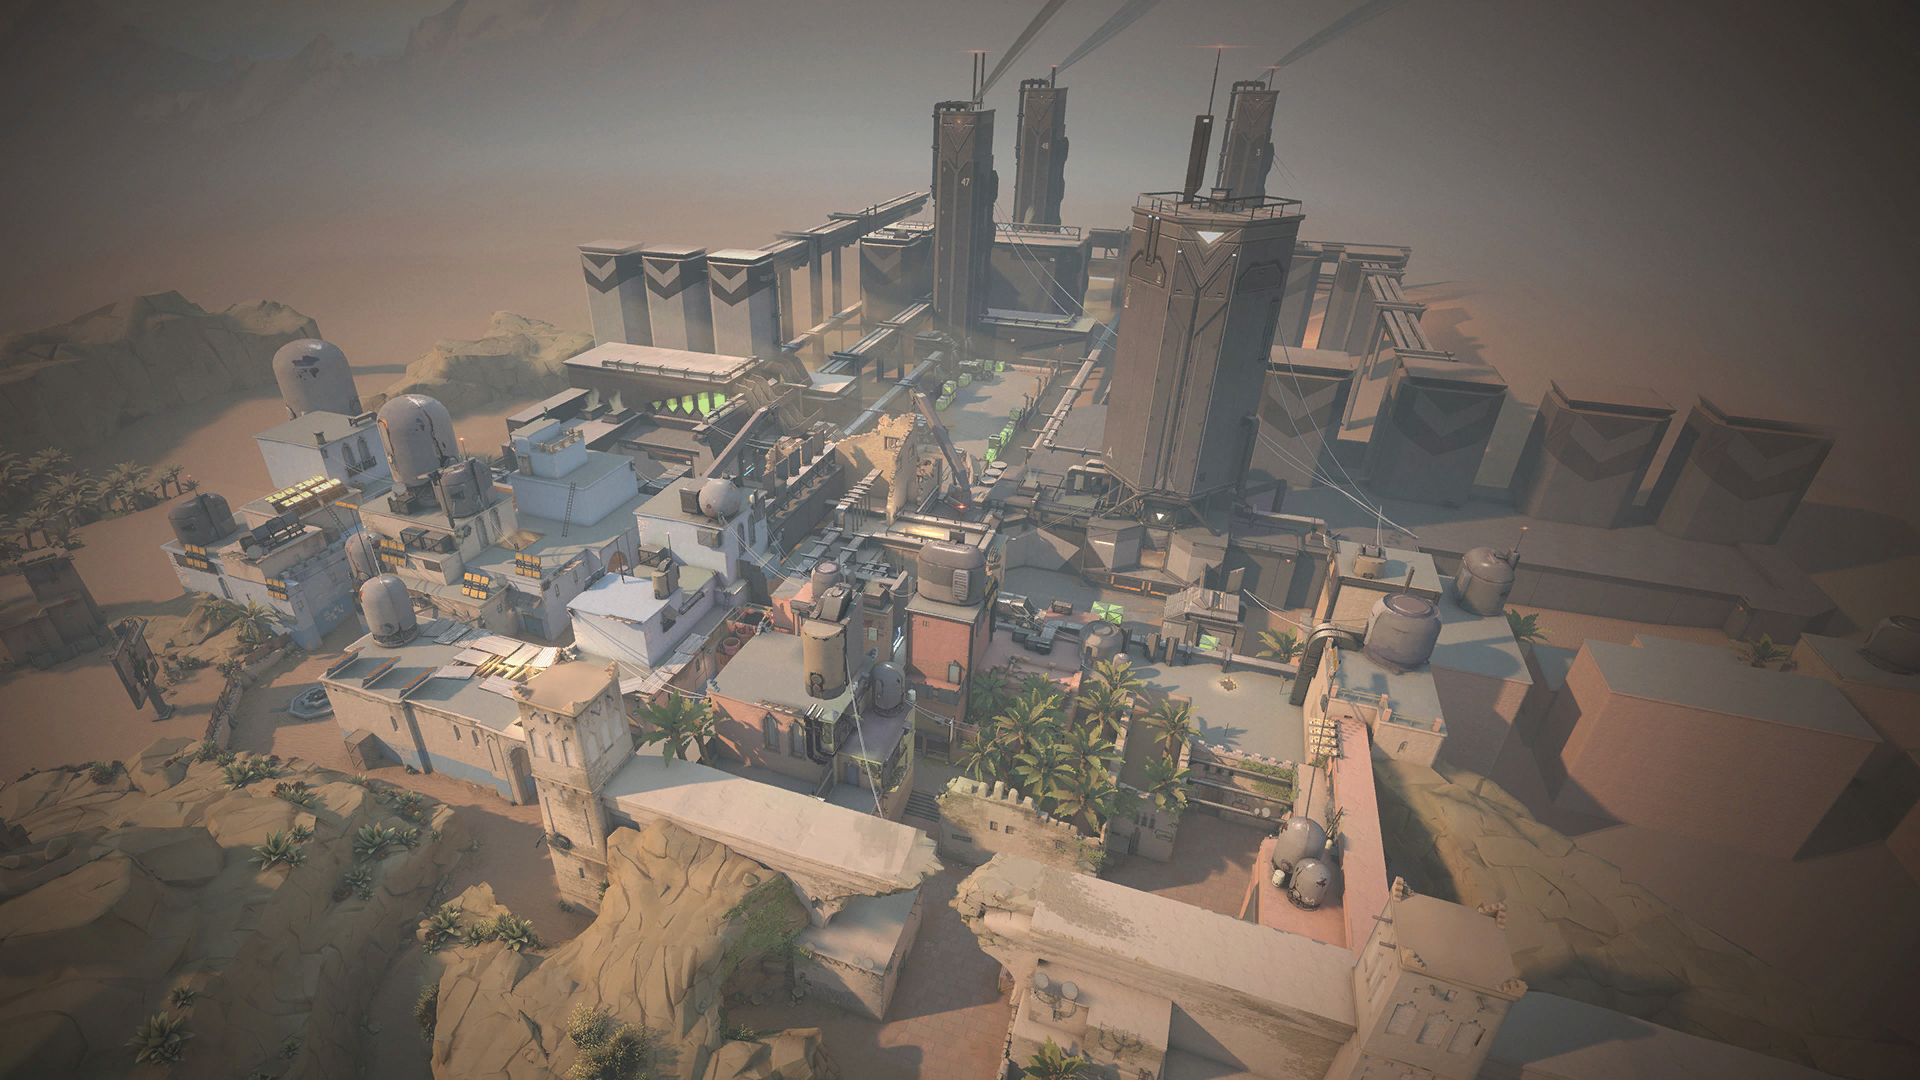
Bind is defined by its unique teleporter system that creates instant rotation opportunities between sites. This two-site map eliminates traditional mid control, forcing teams to adapt their strategies around rapid site executions and defensive rotations.
The map's compact design and teleporter mechanics create intense close-quarters combat scenarios. Teams must master utility coordination and timing to control key choke points while leveraging the teleporters for surprise flanks and quick rotations.
Success on Bind requires understanding teleporter timing and maintaining map control through strategic utility usage. The absence of a middle area makes site commitment and rotation speed critical factors in round outcomes.
Tactical Layout
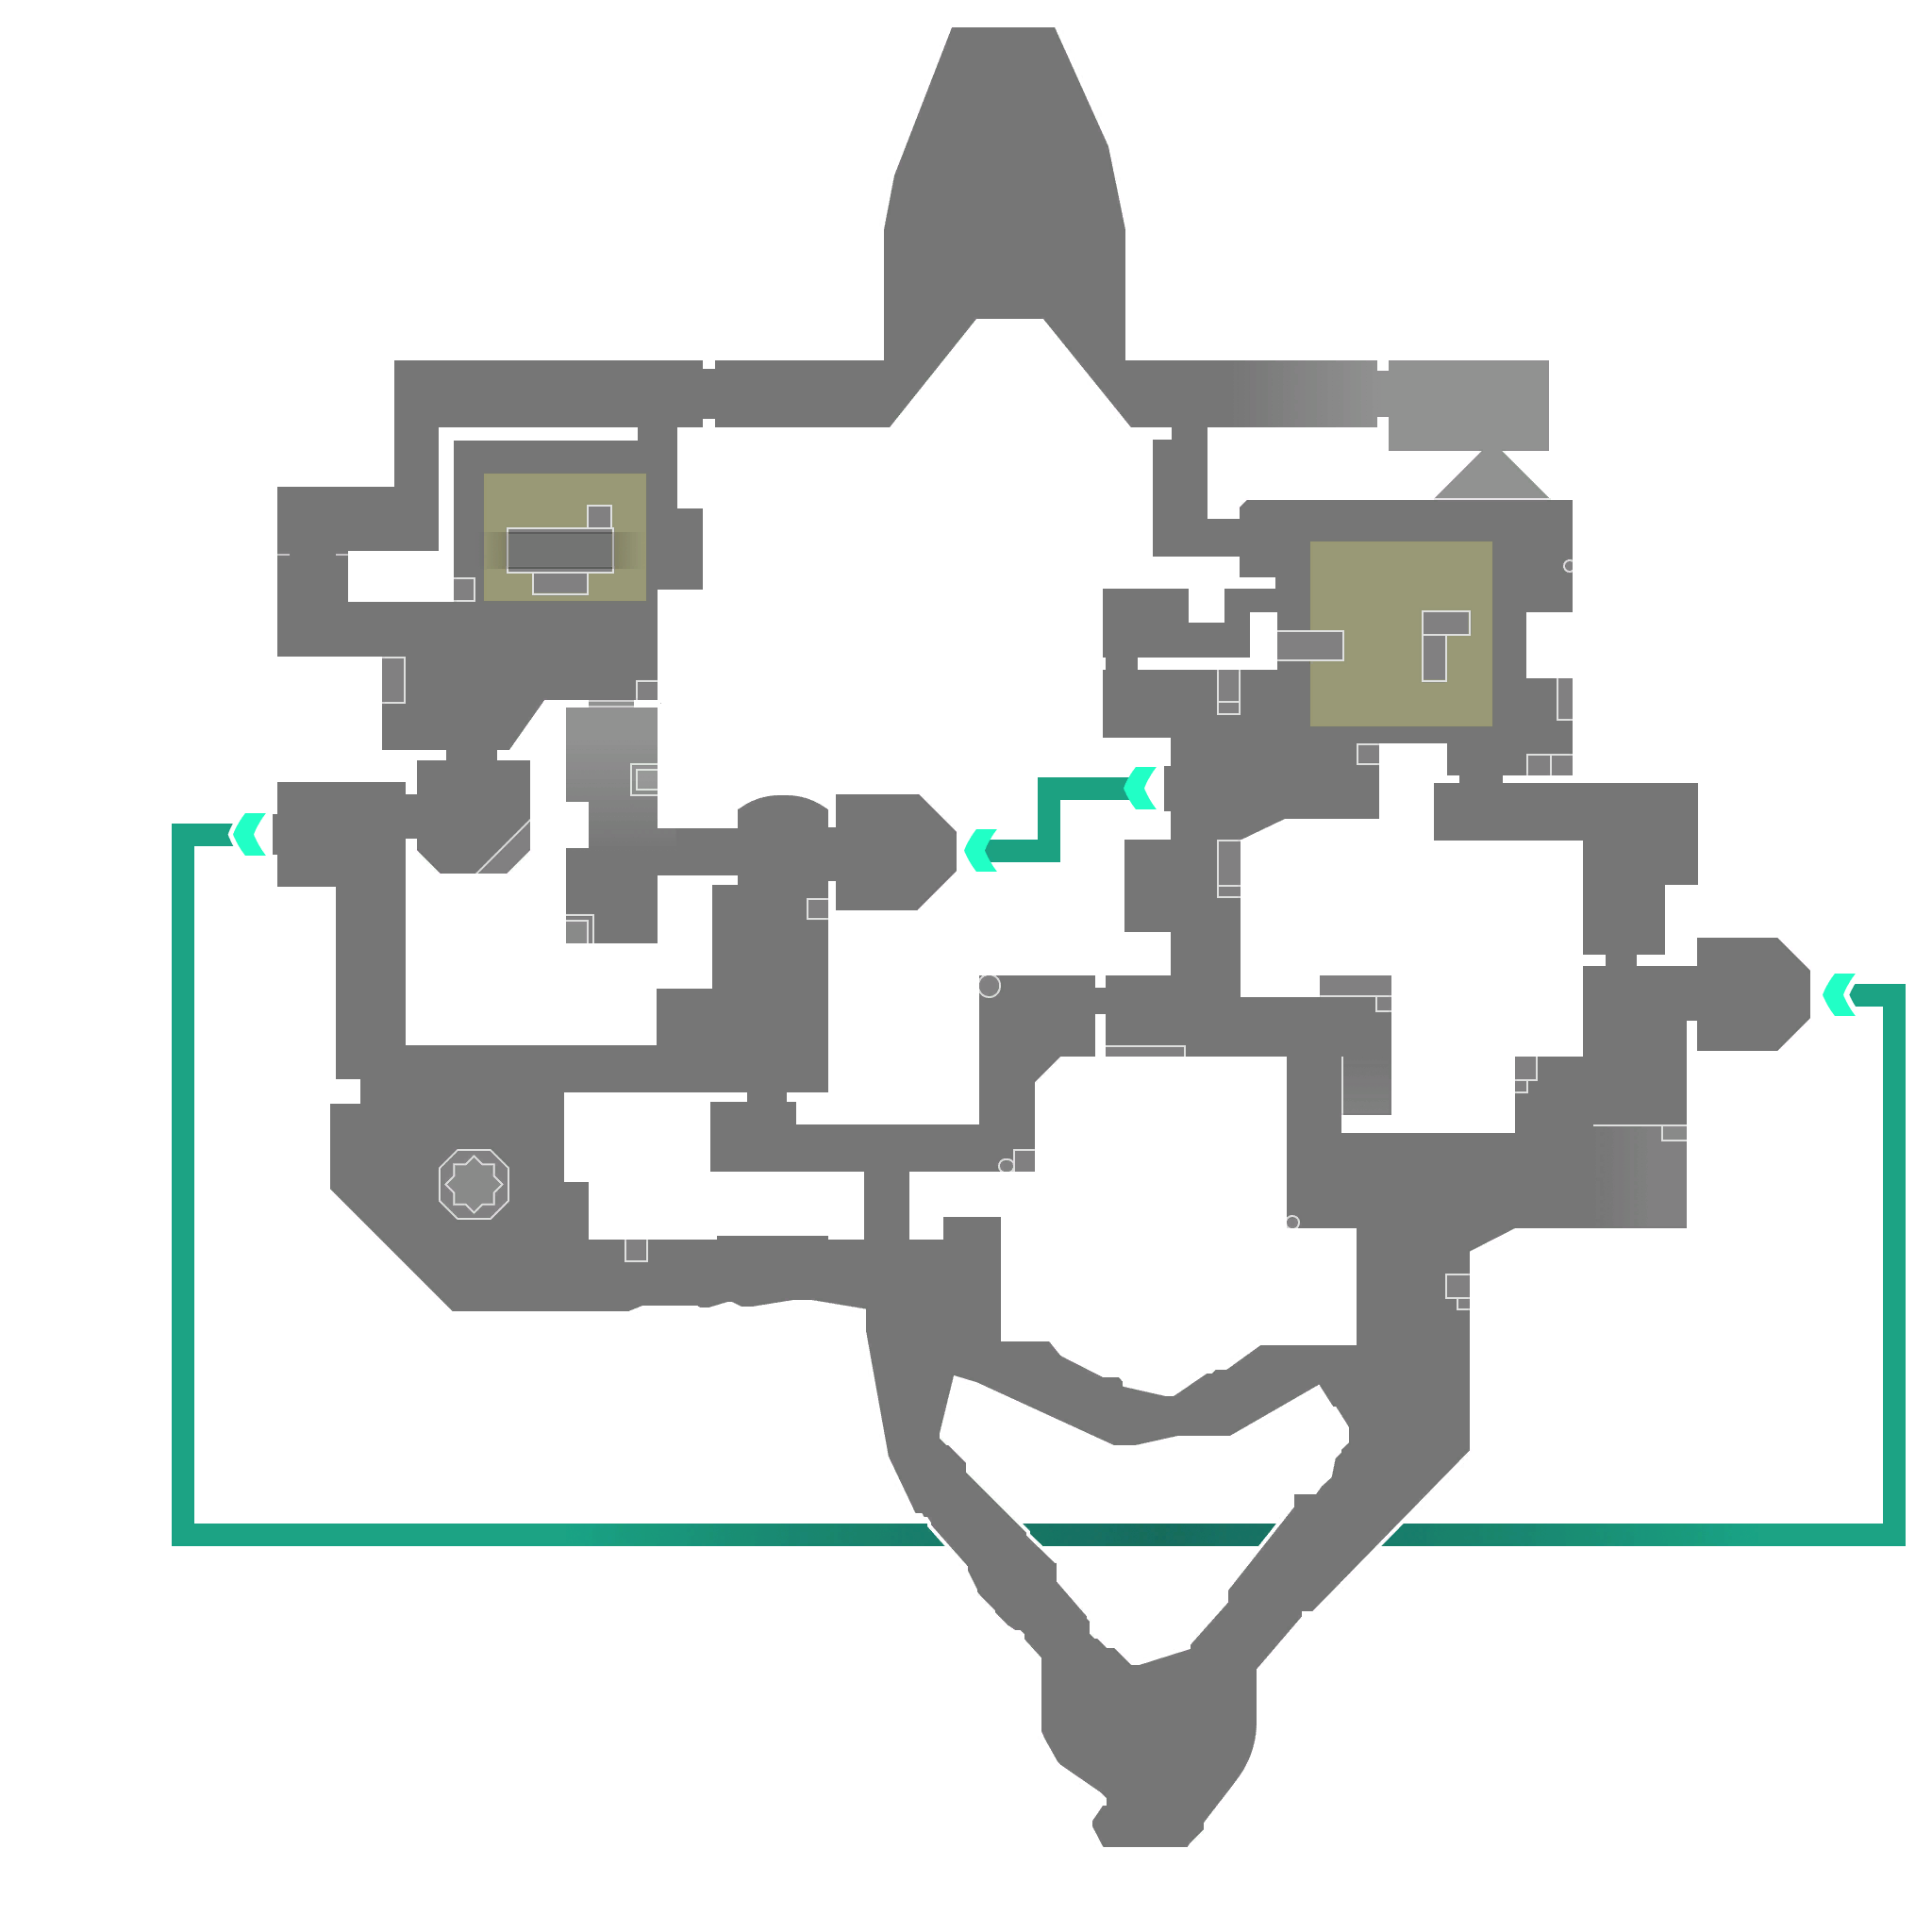
Study the map layout to understand sight lines, rotation paths, and strategic positions. Use this overhead view to plan your team's approach and identify key areas for map control.
Map Information
Pro Tip
Practice your crosshair placement and pre-aim common angles on Bindin deathmatch before jumping into competitive matches. Learn the callouts to communicate effectively with your team.
Map Callouts (24)
A
Exit
Link
Lobby
Short
Site
Teleporter
Bath
Cubby
Lamps
Tower
Attacker Side
Spawn
Cave
B
Exit
Hall
Link
Fountain
Long
Short
Site
Teleporter
Window
Elbow
Garden
Defender Side
Spawn
Best Team Composition for Bind

Raze

Brimstone

Fade

Viper

Vyse
Composition Strategy
This team composition is optimized for Bind's unique layout and strategic requirements. The combination of roles provides excellent map control, site execution, and defensive capabilities. Practice coordinated strategies with your team to maximize effectiveness on this map.